


Jakemy | First Handheld Ultrasonic Cutting & Polishing Machine – Diamond Blade Edition
Jakemy | First Handheld Ultrasonic Cutting & Polishing Machine – Diamond Blade Edition
Jakemy
Couldn't load pickup availability
【First-Ever 2-in-1 Ultrasonic Cutter】
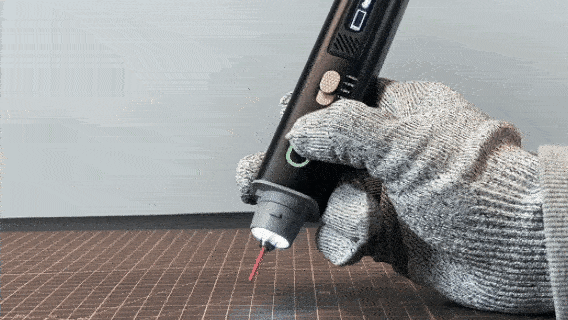
Powered by 40KHz ultrasonic technology, delivering 40,000 micro-vibrations per second, it effortlessly cuts through materials 1–12mm thick at speeds up to 60mm/s. One machine, multiple uses — precision cutting, grinding, and fine polishing — making your DIY dreams limitless. It also comes with five professional blade types, supports multiple modes, and features an OLED display to ensure precise, safe, and efficient creation. This is the perfect tool you’ve been searching for!


Working Mechanism of the Ultrasonic Cutter
The principle of the ultrasonic cutter is based on ultrasonic vibrations, achieving precise cutting through high-frequency oscillation. This technology is widely used in the medical and industrial fields.
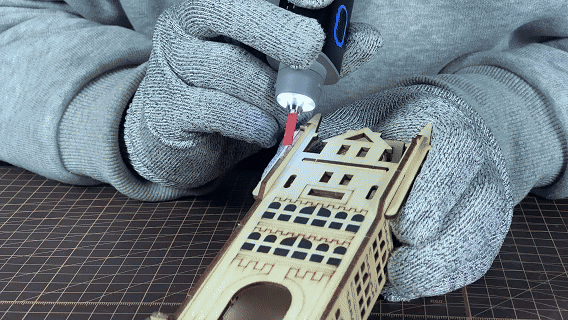
2-in-1 Powerful Ultrasonic Cutting & Polishing Tool
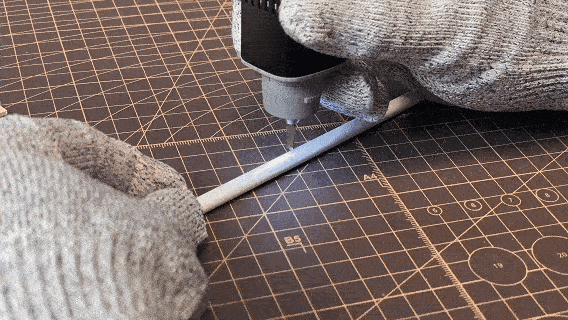
Supports precision cutting, grinding, and polishing.
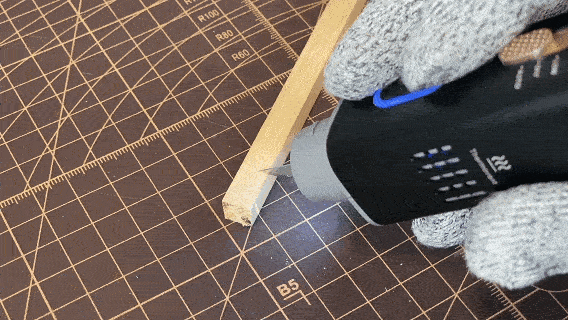
For common 3D printing materials such as PLA, ABS, PETG, resin, nylon, and TPU:
- Cutting thickness: 1 – 12mm
- Cutting speed: Up to 60mm per second
- Cutting quality: Produces smooth, clean cuts
For harder materials such as hard plastics, metal, gemstones, jewelry, shells, and hardwood:
- Grinding speed: Fast and efficient with visible results
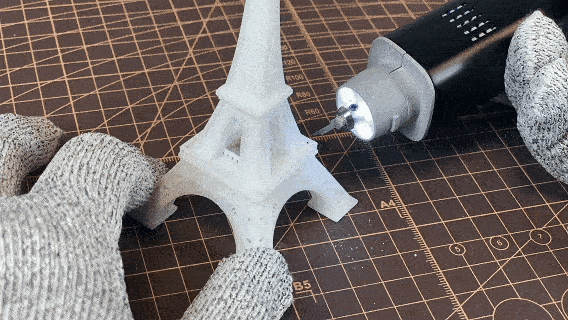
The ultrasonic cutter is quick and effective for polishing small areas. However, due to the small contact surface of the polishing rod, it is not suitable for high-precision polishing over large surfaces.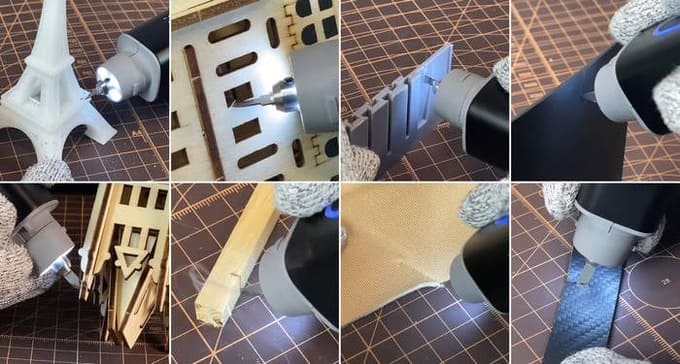
![]()
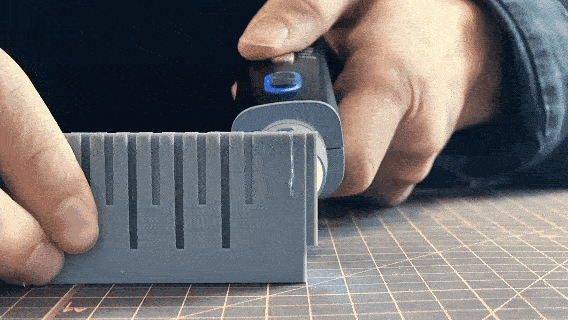
5 Blade Types
Our current five blade designs cover nearly all everyday cutting needs. Each blade delivers different cutting results based on its design and purpose. Likewise, cutting speed can vary significantly depending on the material being cut and its properties.

#1 Blade – 30° Fine Tip
- Standard regular blade
- Handles almost all everyday cutting needs
- Smaller contact surface, cuts faster but with lower precision

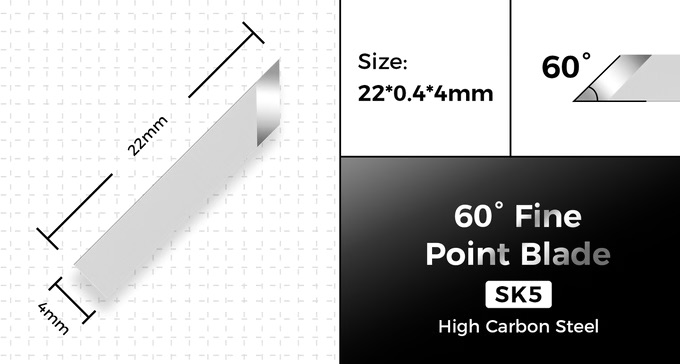
#2 Blade – 60° Fine Tip
- Standard regular blade
- Suitable for almost all everyday cutting needs
- Larger contact surface, slightly slower cutting speed, but higher precision and accuracy
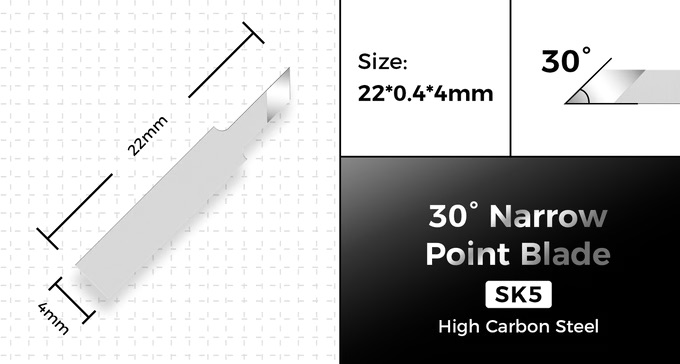
#3 Blade – 30° Narrow Tip
- Standard regular blade
- Suitable for cutting tasks in confined spec
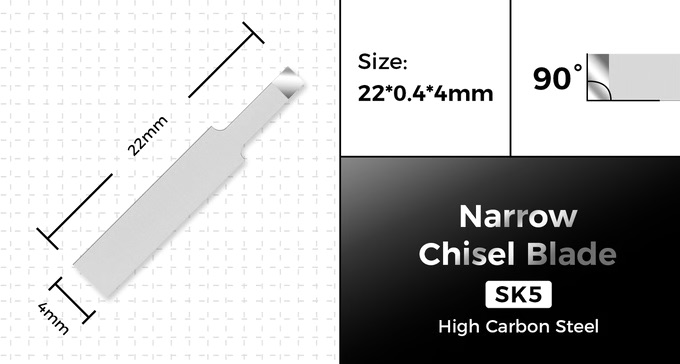
#4 Blade – Narrow Chisel Blade
- Special-shaped blade
- Suitable for grooving softer materials
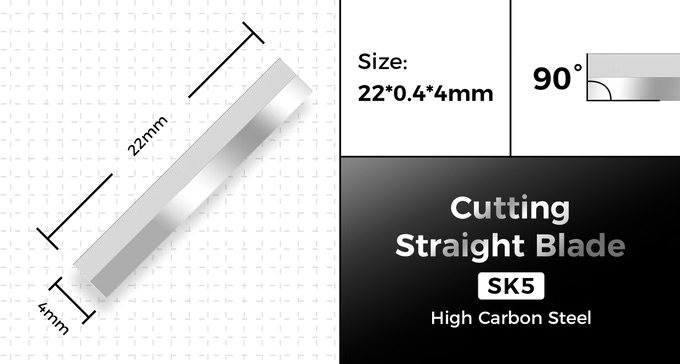
#5 Blade – Straight Cutting Blade
- Special-shaped blade
- Suitable for large-area stripping applications

#1 Precision Polishing Rod
- #800 grit, suitable for polishing hard objects
- Common materials include coins, metals, shells, ceramics, jade, acrylic, plaster, circuit boards, resin, ABS, and more
The handle is equipped with 4 operation modes:
Mode #1: Automatic Mode
When the mode switch is set to automatic, the ultrasonic cutter will enter automatic cutting mode. In this state, it runs continuously, allowing uninterrupted cutting without the need to hold down the trigger. It delivers strong output, making it suitable for cutting harder materials.
Mode #2: Off Mode
When the mode switch is set to off, the ultrasonic cutter stops operating. In this state, pressing the trigger will not generate ultrasonic vibrations. This safety feature prevents accidental activation of the cutter and reduces the risk of injury.
Mode #3: Low Power Mode
When the mode switch is set to low power, the ultrasonic cutter enters manual cutting mode. In this state, you need to hold down the trigger to produce ultrasonic output. With weaker output, this mode is best suited for cutting softer materials.
Mode #4: High Power Mode
When the mode switch is set to high power, the ultrasonic cutter also enters manual cutting mode. In this state, you need to hold down the trigger to produce ultrasonic output. With stronger output, this mode is suitable for cutting harder materials.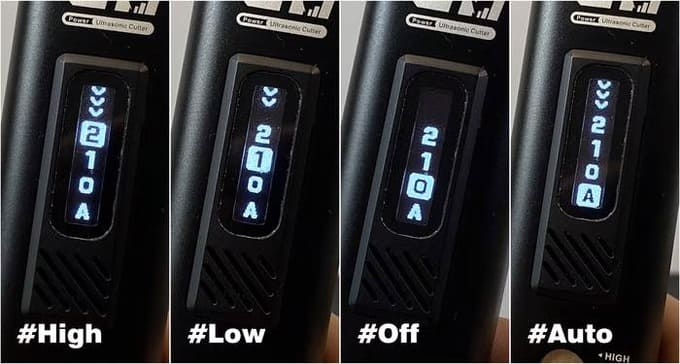
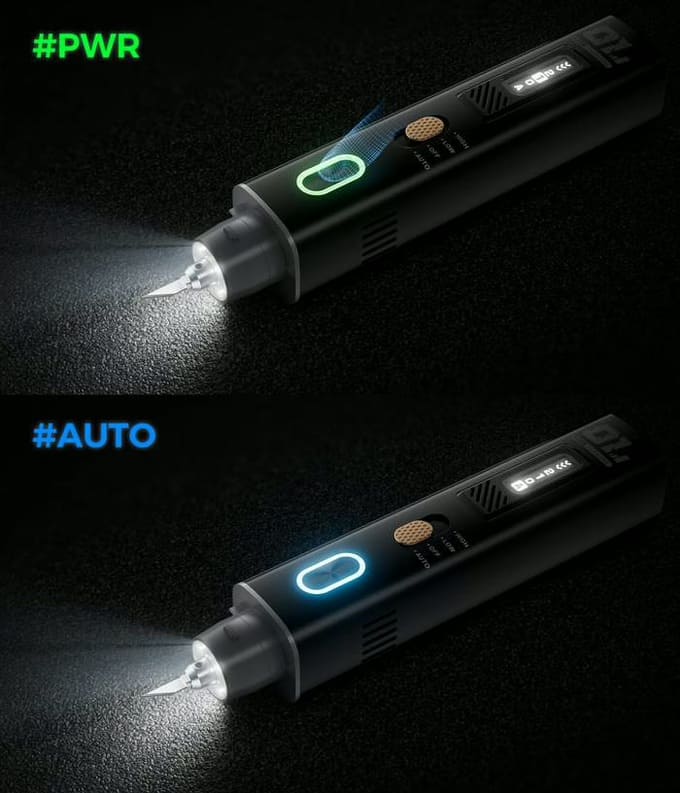
Lighting Modes on the Handle:
- The front work light stays on when the cutter is in cutting mode, and turns off 2 seconds after exiting cutting mode.
- In Automatic Mode, a blue light ring appears around the trigger button.
- In Off Mode, no light is displayed around the trigger button.
- In Low Power Mode and High Power Mode, a green light ring is displayed around the trigger button.
- When the screen temperature parameter indicates that the cutter’s available working hours are nearly exhausted, a cyan light ring will flash around the trigger button. This means the power should be turned off, and the handle needs several minutes to cool down before it can be used again.
Screen Display Information:
- When the cutter is powered on, the screen displays the mode information (A, 0, 1, 2).
- In Automatic Mode (A), there is no need to press the trigger. After 2 seconds, the screen automatically switches to the available working hours bar, showing the remaining hours you can continue using the cutter.
- In Off Mode (0), pressing the trigger does not change the screen.
- In Low Power Mode (1) and High Power Mode (2), pressing the trigger makes the screen directly switch to the available working hours bar, displaying the remaining hours for continuous cutting work.
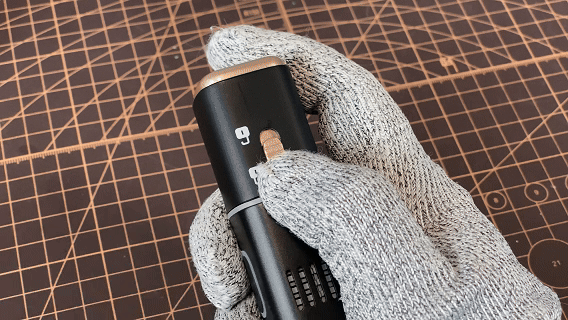
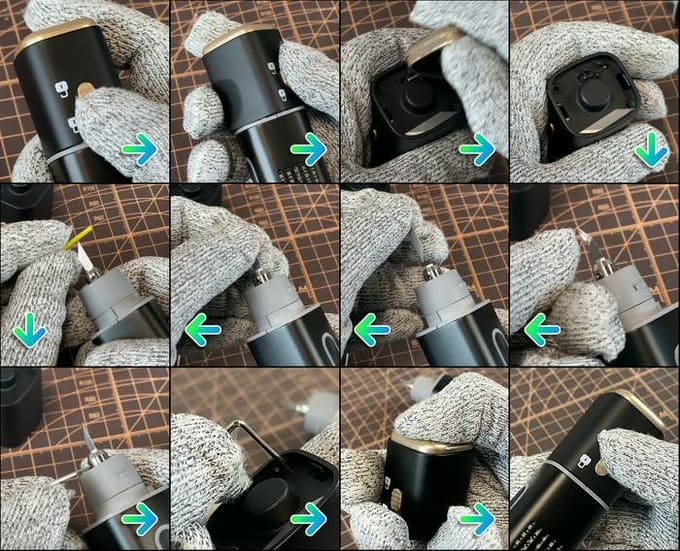
How to Replace the Blade?
- Step 1 – Turn off the child safety lock switch
- Step 2 – Take out the hex wrench
- Step 3 – Loosen the fixing screw
- Step 4 – Wear gloves and remove the blade
- Step 5 – Replace the blade and tighten the screw
- Step 6 – Place the accessories back into the blade cover
Temperature Control and Standby Introduction:
The cutter is equipped with a highly sensitive temperature sensor and a current-stabilizing MOS tube to detect and control heat generated by the internal sensors and amplifier circuit. When the internal temperature exceeds 75°C, the cutter will automatically shut down for protection and can be used again after cooling for about 1–3 minutes.
When the mode switch is set to Automatic Mode, the cutter automatically starts the cutting program. Even without load, heat will gradually build up inside the cutter. To extend the cutter’s available usage time and protect the transducer’s lifespan, switch to Off Mode when not cutting.
When the mode switch is set to Off Mode, the cutter will not respond even if you press the trigger. If no operation is performed within 10 minutes, the cutter will automatically power off.
When the mode switch is set to Low Power Mode or High Power Mode, the cutter only activates when the trigger is pressed. If the trigger is not pressed, it remains in standby mode without generating heat.
Additionally, two square cooling vents are designed on both sides of the mode switch. Normally, these vents do not cause burns, but care should be taken to avoid bringing them too close to soft areas of the body, such as the eyes.![]()
![]()

![]()
![]()
What People Say about Jakemy
-
Expected Delivery
5 - 14 days arrival upon order placed


